Traditional Installation
These instructions assume that your webserver’s root directory is /var/www and that your site will be installed into a directory called tripal4. Please change these in the commands below if your configuration is different.
They also assume that your system meets all the prerequisites for running a Drupal site. Refer to the Requirements page for more information.
Install Prerequisites
If you are starting from a clean operating system installation, you will first need to install some needed programs. First make sure the operating system is up to date.
sudo apt-get update
sudo apt-get dist-upgrade
And restart if requested.
Install PHP
sudo apt-get install php-dom php-gd php-curl php-cli
php --version
Install Apache2 web server. Note the PHP version from step 2 above, and adjust the version of PHP here if necessary.
sudo apt-get install apache2 libapache2-mod-php
sudo a2enmod rewrite php8.1
sudo systemctl restart apache2
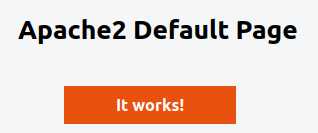
At this point, you should be able to open a browser on your installation system and view the Apache2 Default Page at http://localhost
Install Composer
sudo apt-get install composer
Install PostgreSQL database engine
sudo apt-get install postgresql php-pgsql
sudo su - postgres
createuser -P drupal
and supply a password. Now, while we are still the
postgresuser, give the drupal user the permissions it will needpsql alter role drupal with login replication createdb; ALTER DATABASE "template1" SET bytea_output = 'escape'; \q exit
Install Drupal
Install Drupal using Composer. Composer is now the recommended way to install and manage Drupal, extension modules, and other dependencies. Detailed information can be found on Drupal’s documentation: Using composer to install Drupal and manage dependencies.
Navigate to your webserver’s root directory and prepare a directory. You may not have permission to create the directory here, so set it up first using sudo
cd /var/www
sudo mkdir tripal4
sudo chown $USER:$USER tripal4
Run the composer command to install a fresh copy of Drupal 10 into the
tripal4directory:
composer create-project drupal/recommended-project /var/www/tripal4
(If you are presented with this question, you can respond with a y: Do you want to remove the existing VCS (.git, .svn..) history? [Y,n]?)
This should leave you with a
tripal4directory that looks something like this:tripal4 ├── composer.json ├── composer.lock ├── vendor └── web
The
vendordirectory is where many of the dependencies like drush (see below) are installed.The
webdirectory is the actual webroot for Drupal. This should be the directory that is served by your webserver. The two composer files and thevendordirectory should not be publicly accessible.Install Drush and other required modules, also with composer, ensuring that you are within your new
tripal4directory:cd /var/www/tripal4/ composer require drush/drush drupal/field_group drupal/field_group_table:dev-1.x
Drupal may complain about permissions on certain files, as well as generating a configuration file from the template provided by Drupal. The files in question must be readable and writable by the webserver’s user, as well as yourself. If you’re using Apache, this is typically
www-dataand for Nginx, it is commonlynginx. Read more about Drupal’s requirements here: Administering a Drupal site - security in Drupal, or run the following commands to satisfy them:# Make sure you are in the web root: cd /var/www/tripal4/web # Create the files directory: mkdir sites/default/files # Copy Drupal's configuration template: cp sites/default/default.settings.php sites/default/settings.php # Set permissions, assuming www-data is your web user (Apache). If # necessary, you can determine the Apache username as follows: apachectl -S | grep User # example output is User: name="www-data" id=33 not_used # Using the user name `www-data` or whatever it may be, change ownership as follows: sudo chown www-data:$USER sites/default/files sudo chown www-data:$USER sites/default/settings.php
Configure Apache to allow access to our install location
/var/www/tripal4so that it will show up ashttp://localhost:/tripal4. Use your preferred editor and, with sudo, edit/etc/apache2/sites-available/000-default.confand make the following additions somewhere inside the<VirtualHost *:80>section.Alias /tripal4 "/var/www/tripal4/web" <Directory /var/www/tripal4/web> AllowOverride All </Directory>
After saving these changes, restart Apache
sudo systemctl restart apache2
Navigate to your new site in your browser:
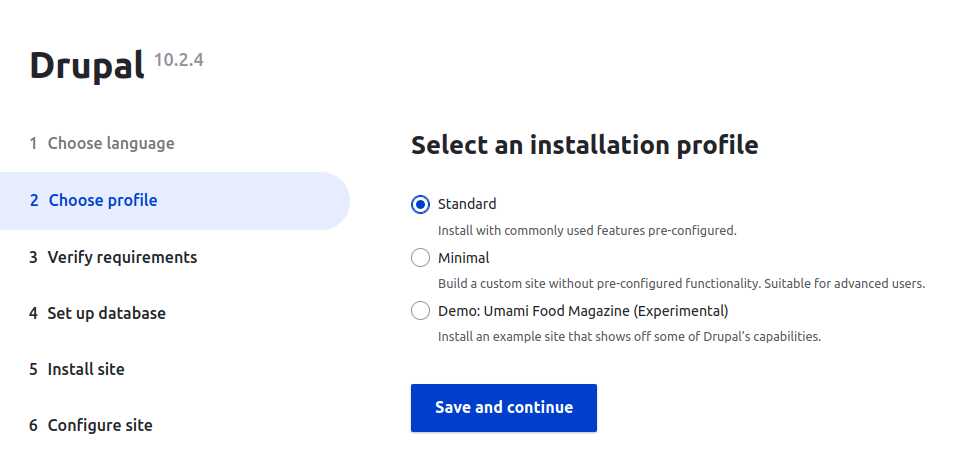
<siteaddress.com>/tripal4/core/install.phpand follow the instructions for setting up a Drupal site. The first page you should appear similar to this:
Select your preferred language and continue.
For the installation profile select Standard, and continue.
If all requirements are met, step 3 should be skipped automatically.
- In step 4, you will be asked to provide credentials for a database user. Postgres is required for Chado, and therefore it is strongly recommended to use a Postgres database for Tripal.
Detailed information on creating a Postgres database and user account can be found here: Getting started - installing Drupal. For the Database name you can use whatever you like. For example
sitedb. The Database usernamedrupaland Database password must be the same as the ones you provided earlier in prerequisite step #5.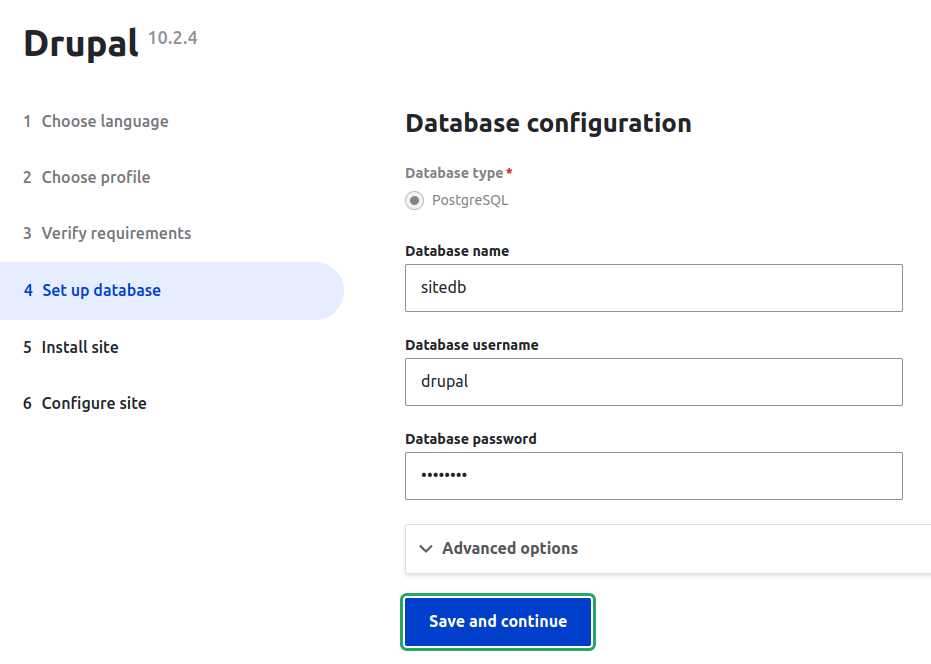
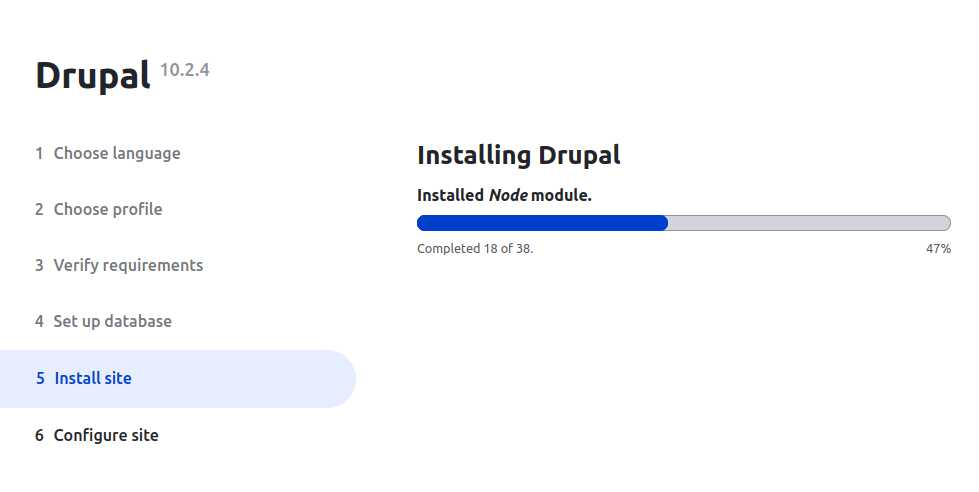
For step 5, installation of Drupal should begin, with progress shown similar to this.
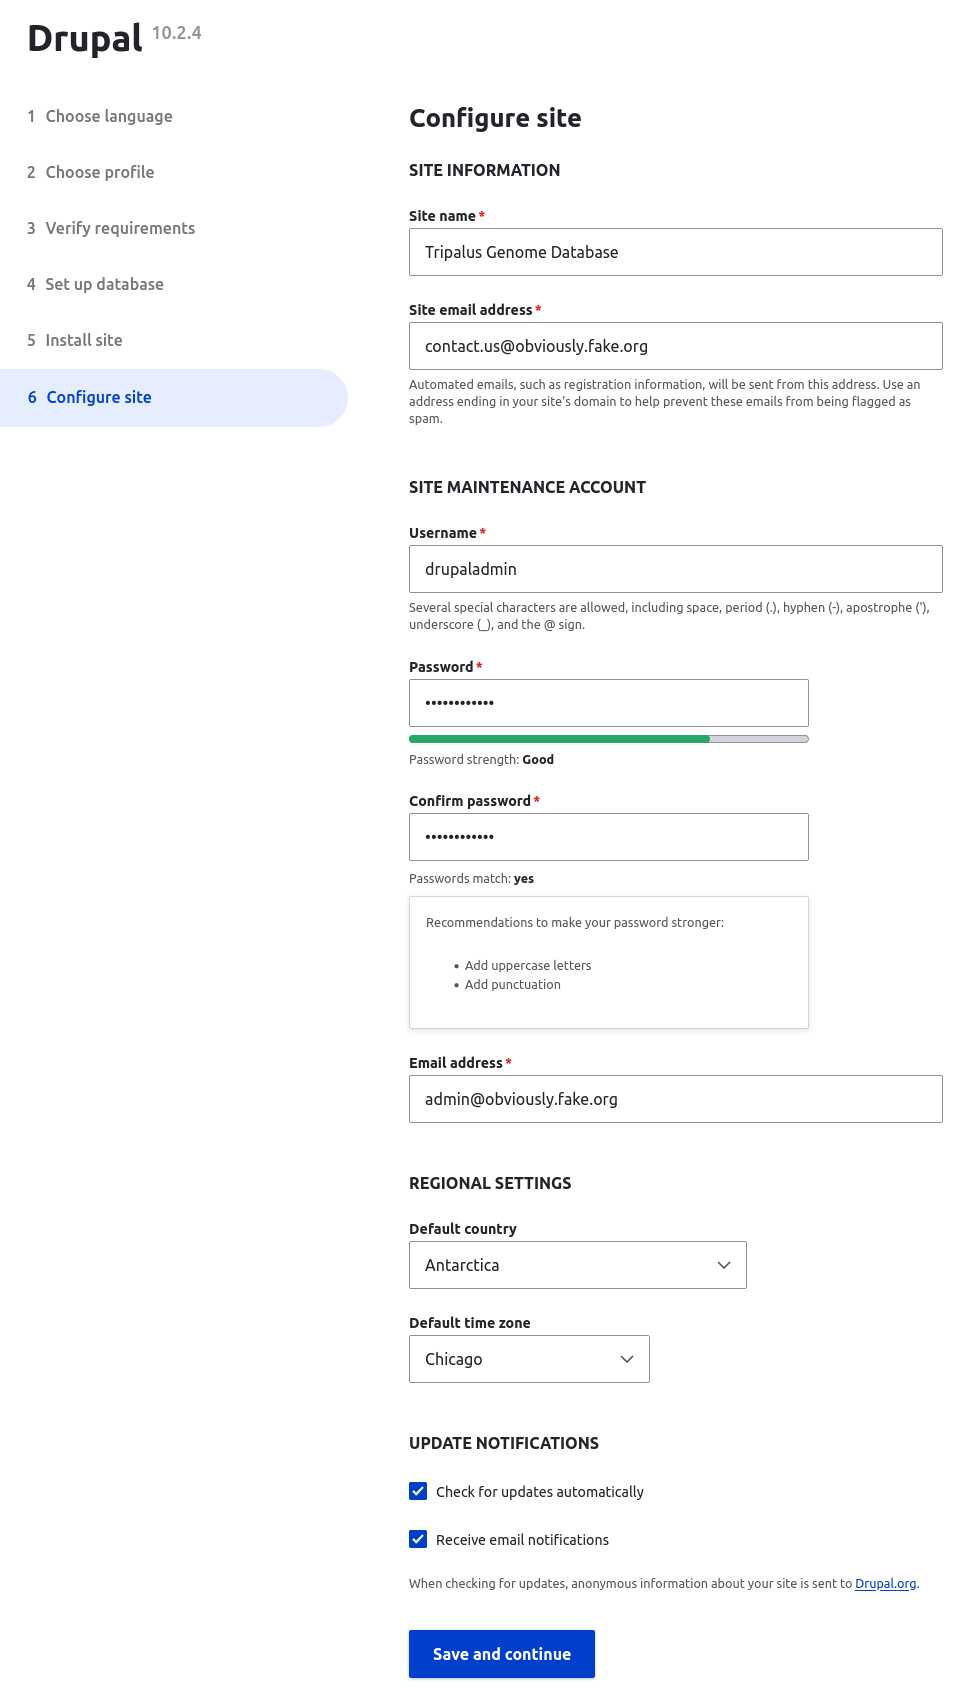
For step 6, you will need to configure your site. An example is presented below, enter appropriate information for your site.
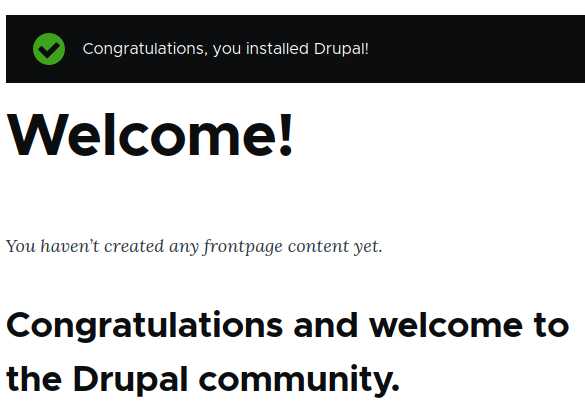
You should then see a screen similar to this.
Install Tripal
We need to first add the Tripal module. There are two options, depending on how you will use your site. If you are installing a production site, or are just trying out Tripal, use method “A”. If you are a developer you should use method “B”.
Production or testing installation. To just use the most recent stable version of tripal install this way:
cd /var/www/tripal4/
composer require tripal/tripal
To install the most recent development version:
cd /var/www/tripal4/
composer require tripal/tripal:4.x-dev
To install a specific released version, find the tag in the Tripal release page, and install it like this:
cd /var/www/tripal4/
composer require tripal/tripal:4.0-alpha3
Developer installation. Clone the Tripal repository in your
web/modulesdirectory.Note: Within the
modulesdirectory, you may create your own custom directory to store other extension modules.cd /var/www/tripal4/web/modules/ git clone https://github.com/tripal/tripal.git # or if you have a GitHub account configured git clone git@github.com:tripal/tripal.git
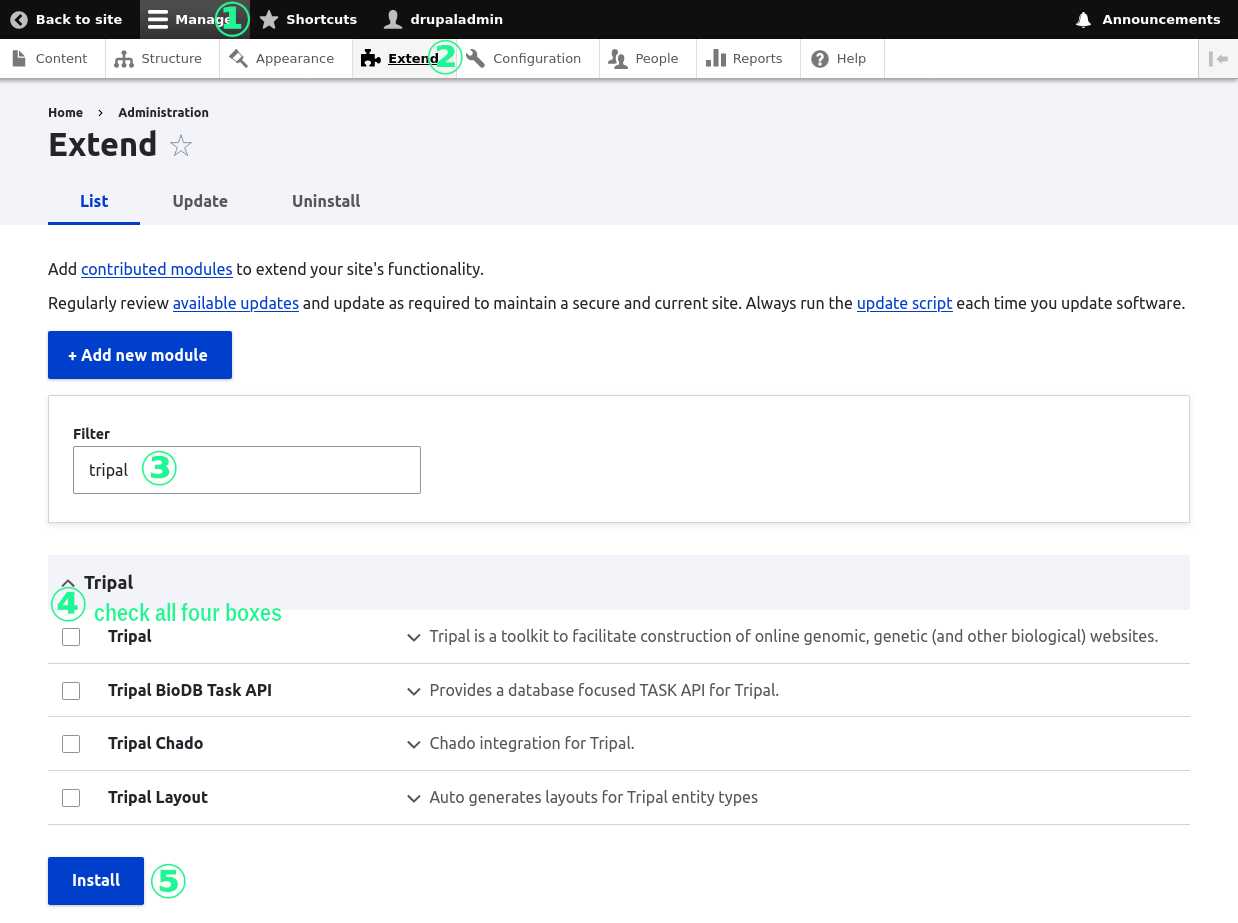
Enable Tripal in your site using the Administration Toolbar: Manage > Extend
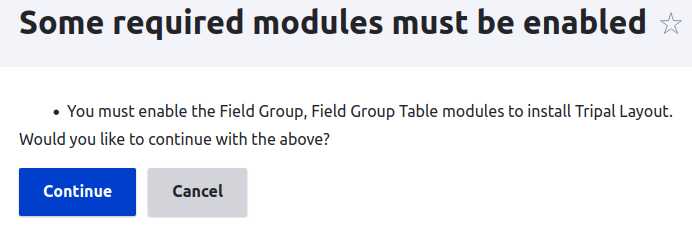
Select “Continue” to also install “Field Group” and Field Group Table”
If successful you will see:

Use Drush to rebuild the cache so that Tripal menu items appear correctly.
/var/www/tripal4/vendor/bin/drush cache-rebuild
Install and Prepare Chado
The site is not quite ready to use yet! The Chado schema must be installed and the site must be prepared to use the installation.
- On your site, navigate to Tripal → Data Storage → Chado → Install Chado
The page should warn you that Chado is not installed. Use this form to install it. If you wish, you can provide a custom name to your Chado schema:
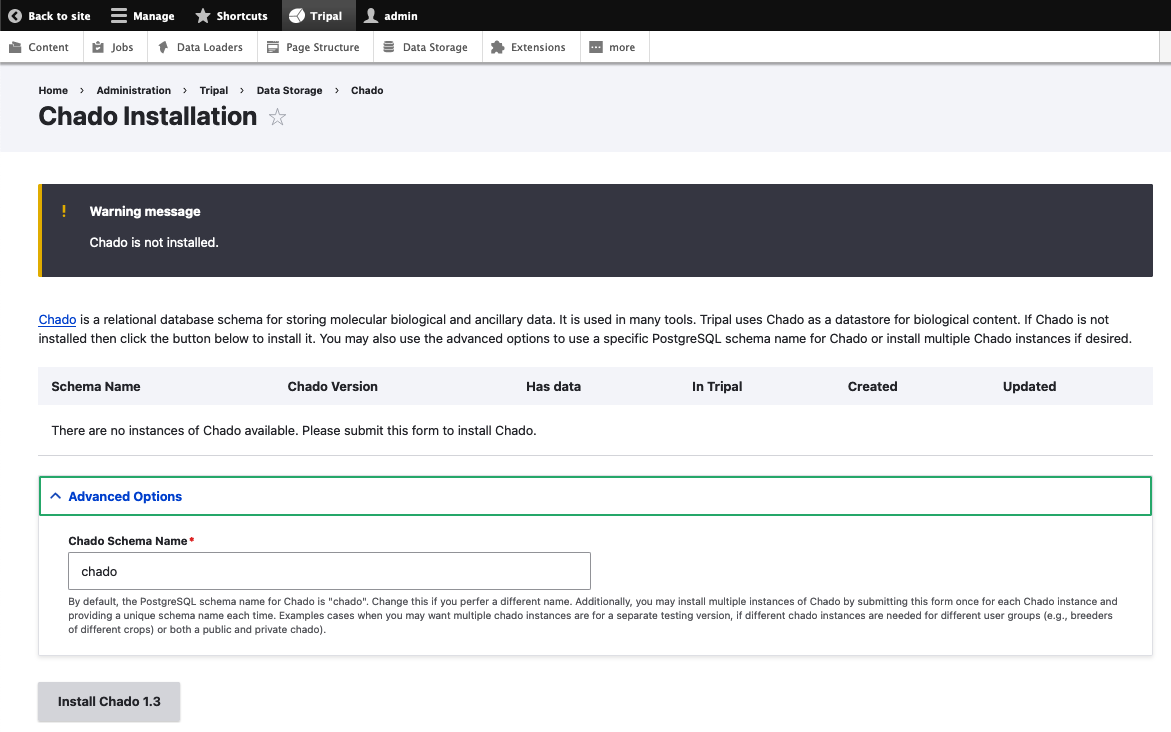
Click “Install Chado 1.3”. You will be prompted to use Drush to trigger the installation of Chado. This must be done on the command line:
/var/www/tripal4/vendor/bin/drush trp-run-jobs --username=drupaladmin --root=/var/www/tripal4/web
Once Chado is installed, the site must be further prepared. Navigate to Tripal → Data Storage → Chado → Prepare Chado
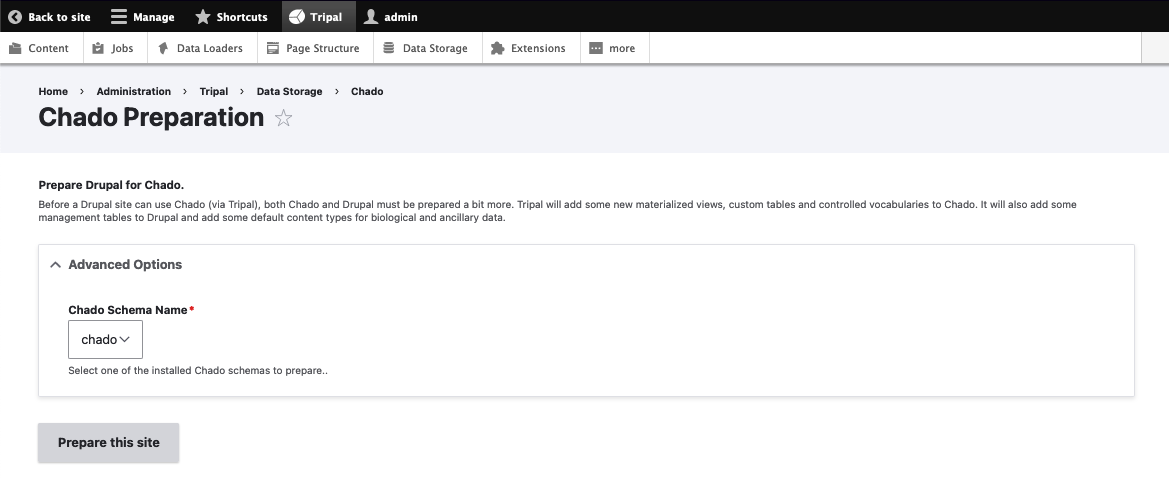
Click “Prepare this site”, and like before, run the supplied Drush command:
/var/www/tripal4/vendor/bin/drush trp-run-jobs --username=drupaladmin --root=/var/www/tripal4/web
Congratulations, you now have a freshly installed Tripal 4 site with Chado as the storage back end. The next step is Building your Site