Views
The hook_views_data() function
The hook_views_data function is used to expose tables within Drupal to the Drupal Views. The function returns an array that defines how tables can be handled by Views. Fortunately, this is mostly backwards compatible and you can keep the function as is. However, you will need to make the following changes:
Where handlers are defined for the field, filter, sort, relationship, argument you must change the key handler to id.
Handler names are now just a single word. The following table provides some common name changes.
Handler Type |
D7 Handler Function |
D8/9 Handler ID |
|---|---|---|
field |
views_handler_field |
standard (strings) |
views_handler_field_numeric |
numeric |
|
views_handler_field_date |
date |
|
filter |
views_handler_filter_numeric |
numeric |
views_handler_filter_string |
string |
|
views_handler_filter_date |
date |
|
sort |
views_handler_sort |
standard (strings) |
views_handler_sort_date |
date |
|
argument |
views_handler_argument_string |
string |
views_handler_argument_date |
date |
|
relationship |
views_handler_relationship |
standard |
You can find additional handlers at these API pages:
The hook_views_default_views() function
In Drupal v7 this function was used to provide the set of views that you would like the end-user to see automatically when the module is installed. This function is no longer used neither is the <modulename>.views_default.inc file where this hook would be stored. Instead the default views are provided in YML format.
Step 1: Create the View: To recreate any views that your module provided in Drupal 7, you must recreate the View using the Views UI interface. No coding is required.
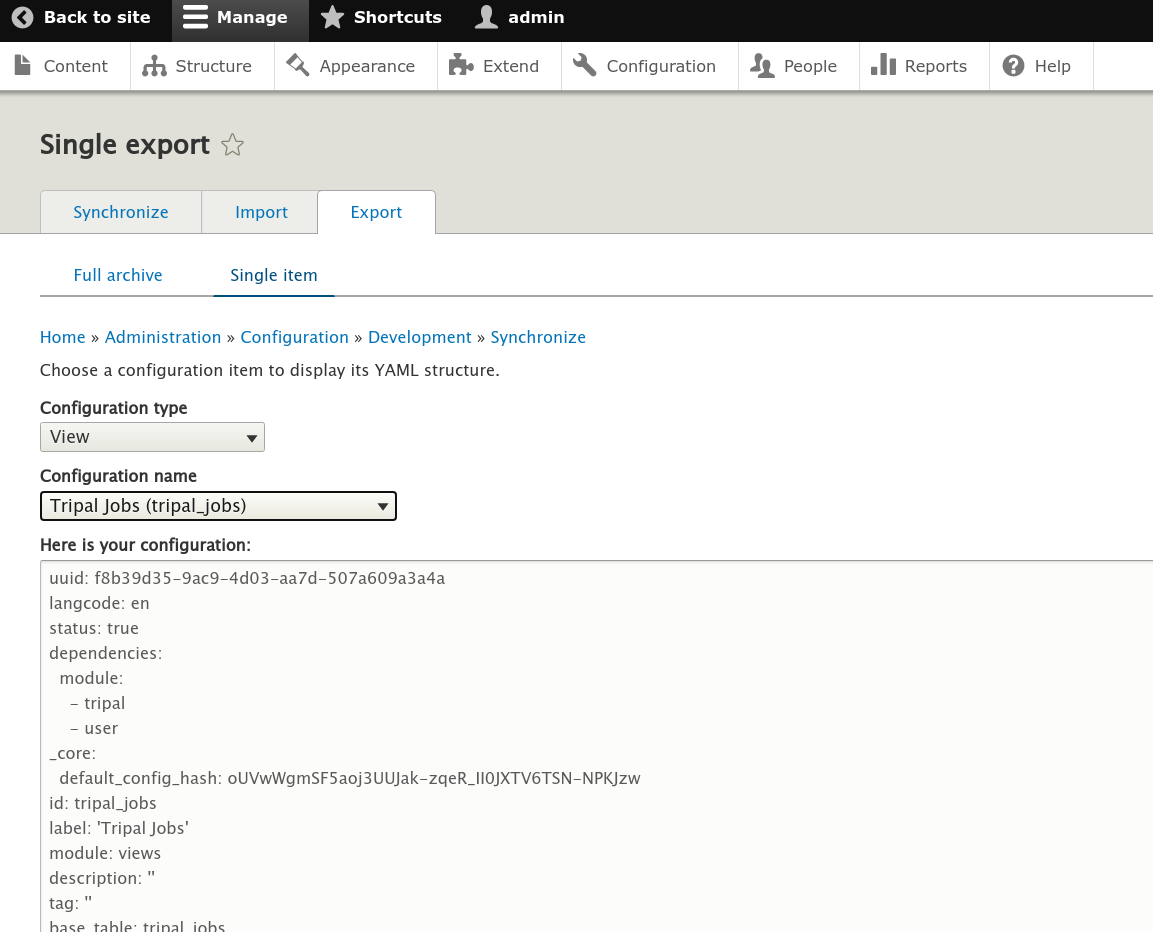
Step 2: Export the View: Once the view has been recreated, you can export the YML for the view by navigating to Admin >> Configuration >> Configuration Synchronization. Click the Export tab at the top, then click the single item link below the tab. In the page that appears you should then select View from the Configuration type dropdown and then select the name of the view you want to export. The YML code for the selected view will appear in the textarea below. The screenshot below shows an example:
Step 3: Create the View YML file: Once you have the YML code for the view, you must create a new file named views.view.<view_name>.yml and place the code inside of it. Where <view_name> is the machine name of the view. You can safely remove the first uuid line. This file must be placed in the config/install directory of your module.
Step 4: Reinstall the Module: In order for Drupal Views to see this new view you must reinstall the module.
Embed a View on a Page
In Drupal v7 you could embed a view onto any page by using code similar to the following
$view = views_embed_view('tripal_admin_jobs', 'default');
In Drupal 8 use code similar to the following to embed a view on a page:
$view = \Drupal\views\Views::getView('tripal_jobs');
$view->setDisplay('default');
if ($view->access('default')) {
  return $view->render();
}
else {
  return [
    '#markup' => 'You do not have access to view this page.',
  ];
}